For our last drawing of the semester we’re going to do a portrait. This can be a self-portrait or a portrait of someone you know (not celebrities or internet captures), and can be from life or a photo. Just a reminder that capturing a likeness is not our main goal or criteria for this drawing–close observation, exploration, and expression of the planes of the face, neck, and shoulders, in a well-composed, sensitively made drawing is our goal.
While there are exceptions to every rule, portraits usually work best when they include the head, neck, and shoulders, at least down to the collar bone. I strongly encourage you to do the same.
This past week we drew from another artist in order to get a running start. Capitalize on that experience as much as possible, and google “Pencil Portrait Drawings” or “Master Portrait Drawings” for more ideas and inspirations. I’ll also be sending a Powerpoint to help with this.
Working from Life
A self-portrait from life has its obvious advantages—a readily available and cooperative model.
When working with someone else, be sure you have sufficient commitment and seriousness of purpose from your model (so they don’t bail on you, can’t keep relatively still, or make nervous chatter). Giving them a screen to occupy themselves (or better yet a podcast) is a good strategy.
A screen (or book) in their lap is not recommended since it turns their face downward.
Ask them to fix their gaze on some object or point in space in order to maintain their pose.
Working from a Photo
If your drawing is from a photo, either of you or someone else, it needs to be a photo taken this week for this purpose—that is, a photo that captures a conventional portrait pose rather than a candid shot you might already have on Instagram. See more under Posing Your Model, below.
Working from a black and white photo will make things easier, especially if you’re drawing values.
Media
Your drawing can be any medium of your choice, and any size.
Drawing Style
Your drawing can be a contour drawing (like the Juan Gris or Egon Schiele portraits we did early on), a fully developed value drawing, or something in between.
The style of your drawing can range from high resolution to looser, more expressionistic work, but must aim for anatomical proportion and clearly stated planes of the head, neck, and shoulders to produce a volumetrically convincing head (any one of last week’s master portrait drawings, including the one you chose, is a good example).
As I advised when that project was assigned, working in the manner of the artist you just drew from is highly recommended (but not required).
Posing your Model
Whether you’re drawing yourself or someone you know, from either life or taking a photo, please make note of the following:
Self-portraits can be either frontal or ¾ view (the head slightly turned), but beware—3/4 views, with literally all of the features foreshortened in some way, are less static but also more difficult to manage. Raising or lowering the chin, in either type of pose, also adds visual interest but also raises the level of difficulty.
Be attentive to lighting, and avoid shadows that conceal forms. A primary light on one side of the face and a secondary light (or reflected light) on the other side are a classic approach.
If you’re taking a photo, pose your model in a way that’s consistent with the master portrait drawings you saw last week. When we see a drawing it’s clear that it took a certain amount of time. If your sitter’s expression (like mugging for the camera or other fleeting expression) is more instantaneous, there’s a dissonance between the time of the pose and the time of the drawing. While that kind of drawing can certainly be made, we want these to look as if they were drawn from life in real time; the photo is just an aid in that process, so pose the model as if you were going to draw them for 3-4 hours. If in doubt, send me your photos before you begin.
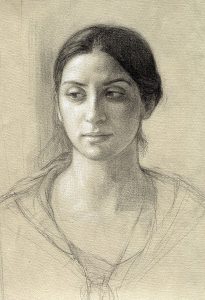
Give careful thought to attire and try to choose clothing and collar styles that don’t add undue difficulty (ones with complex patterns in the fabric, for instance), but that do create a strong shapes and a strong setting for the head, like this portrait by Helen Uger, in which the neckline echoes the shape of the jaw and the face in general (Note: This is on toned paper with white highlights):
If you don’t want to deal with long and/or curly hair, wear it back (if you can), or under a hat or scarf.
Hats can be very effective in framing the face and emphasizing the volume of the head, but avoid cast shadows that obscure the features.
If you haven’t already, view the short videos by Proko, focusing on the facial features and the hair.
Thumbnail Drawings
If you’re drawing from life, I strongly urge you to do some thumbnail drawings beforehand to get the best composition. I invite and urge you to get an early start and send me your thumbnails for feedback before you begin.
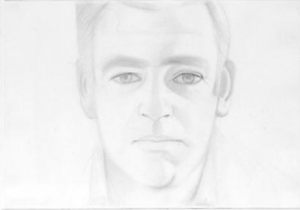
While vertical formats for this kind of drawing are most common, you might explore horizontal compositions as well, such as this one by Alex Katz.
If you’re working from a photo, your photo shoot is tantamount to your thumbnail sketches—take multiple shots and review them to find the best one to work from. I’m also more than happy to review these with you before you begin.
Making the Drawing
Even with thumbnails or a well-chosen photo, be prepared to make more than one portrait—at least one to warm up, but possibly additional ones to get the best result. This is not the week to leave well enough alone, but to give it your best shot.
For more about how to draw the portrait, see my demos, which are forthcoming.

