For our third week, we’re going to do four small drawings that explore value in both pencil and pen, and in two different idioms. These drawings will then come together (in virtual space) to create two larger drawings by the entire class.
To make this work in unison, please read and adhere to the following guidelines:
Team Value Drawing
For this project I’ve drawn a grid on an image and divided it into 36 equal rectangles. I’ll be sending each of you two of the pieces. Your job will be to reproduce the two images I send you as accurately as possible in terms of line, shape, proportion, value relationships, edges, and gradations. In addition to teaching us an important lesson about seeing and drawing values (lights and darks), it should be fun to see the “reveal” when I send the reconstructed image back to you, comprised of all 36 “tiles” (two from each person in the class) and you get to see how your two pieces contribute to the whole.
None of the sections, like the one shown here, will be recognizable. While each of them is a specific but abstract arrangement of forms and values, when they’re placed together they’ll create a recognizable image. The more accurate your individual drawings, the more accurate the overall image will be.
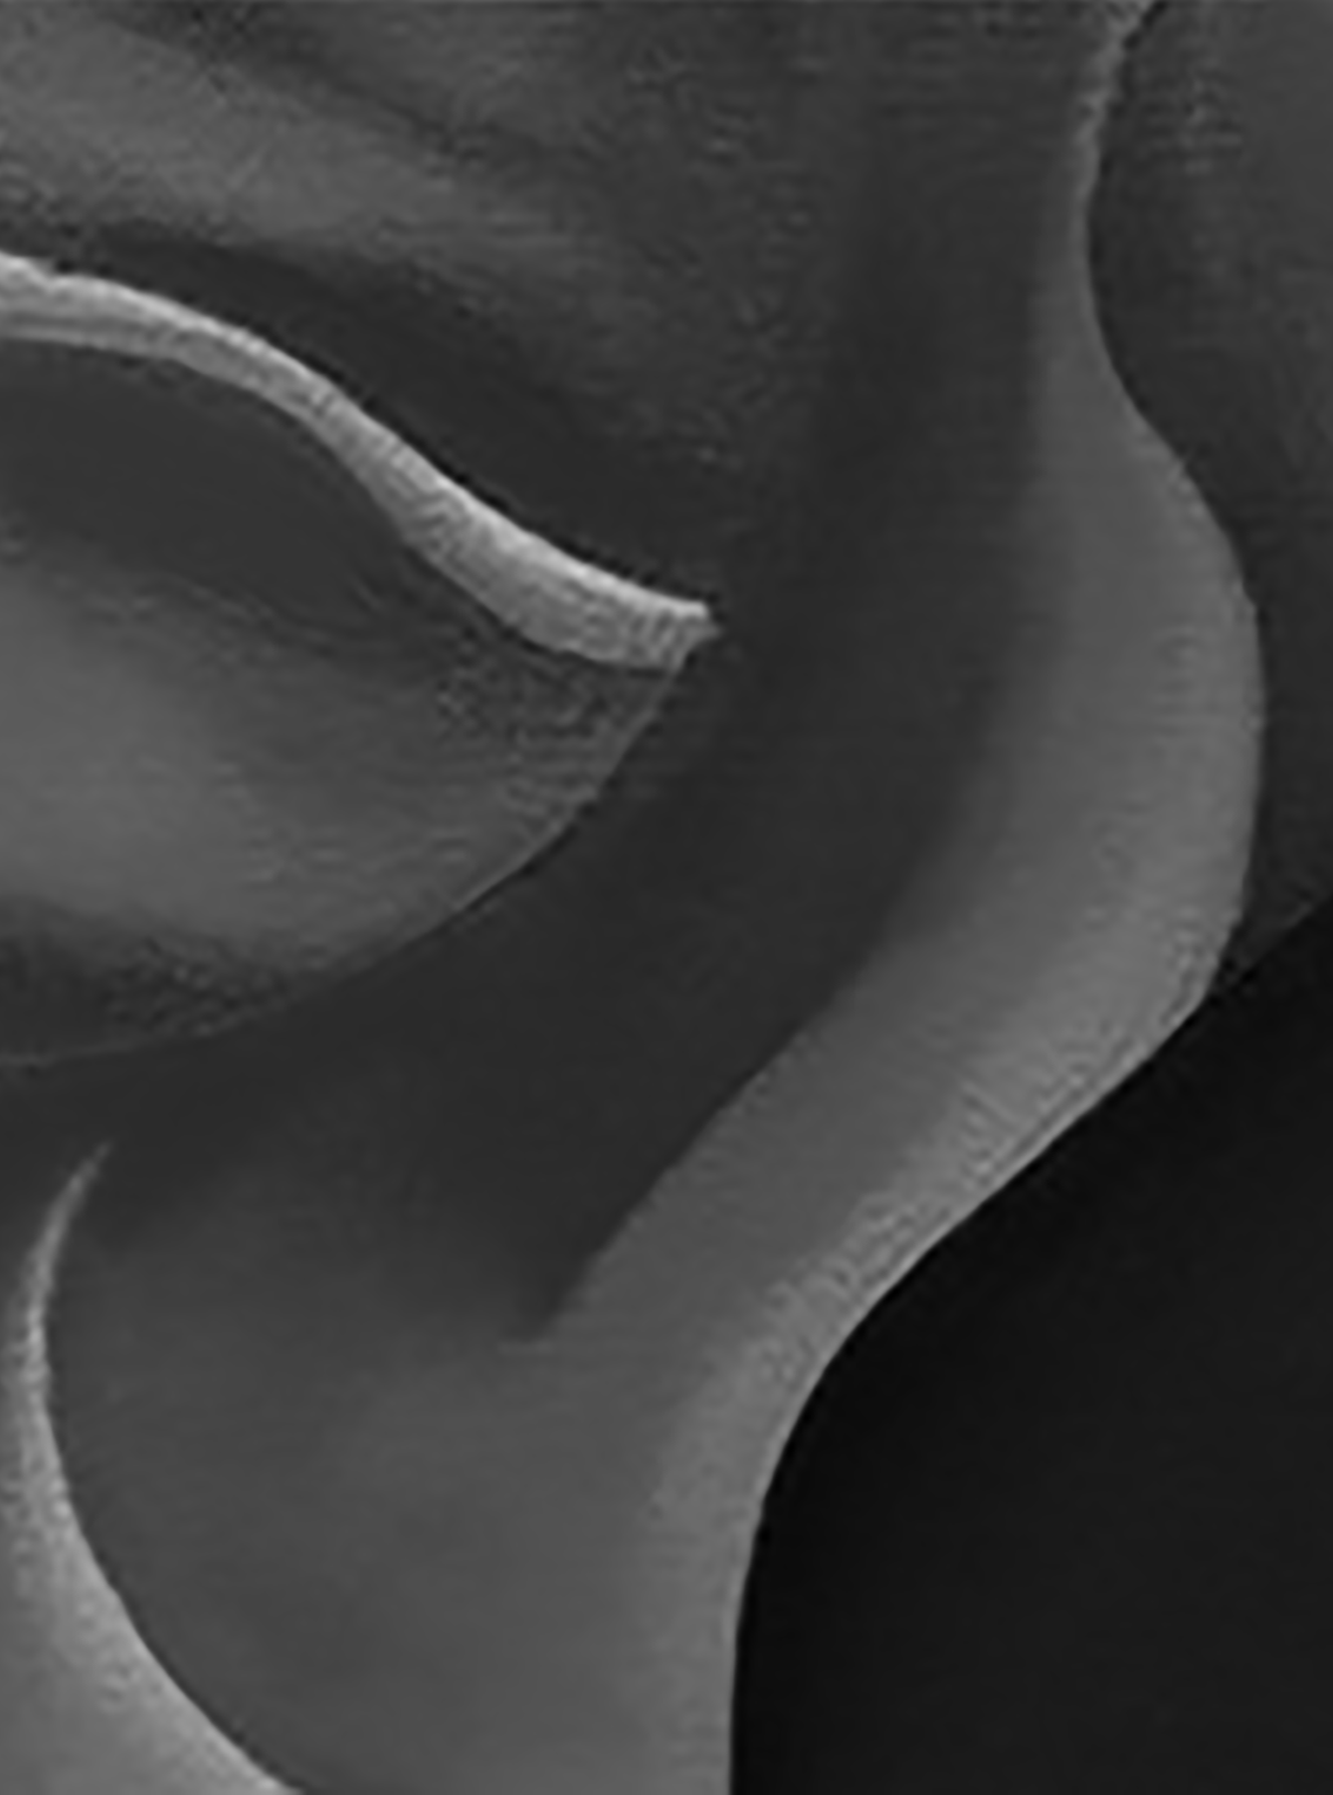
I’ve chosen the final image because when its divided into 36 sections, each section has a very similar degree of complexity–which is to say, difficulty (rather than some sections being simple and others complex)– and a similar, full value range in each.
Steps
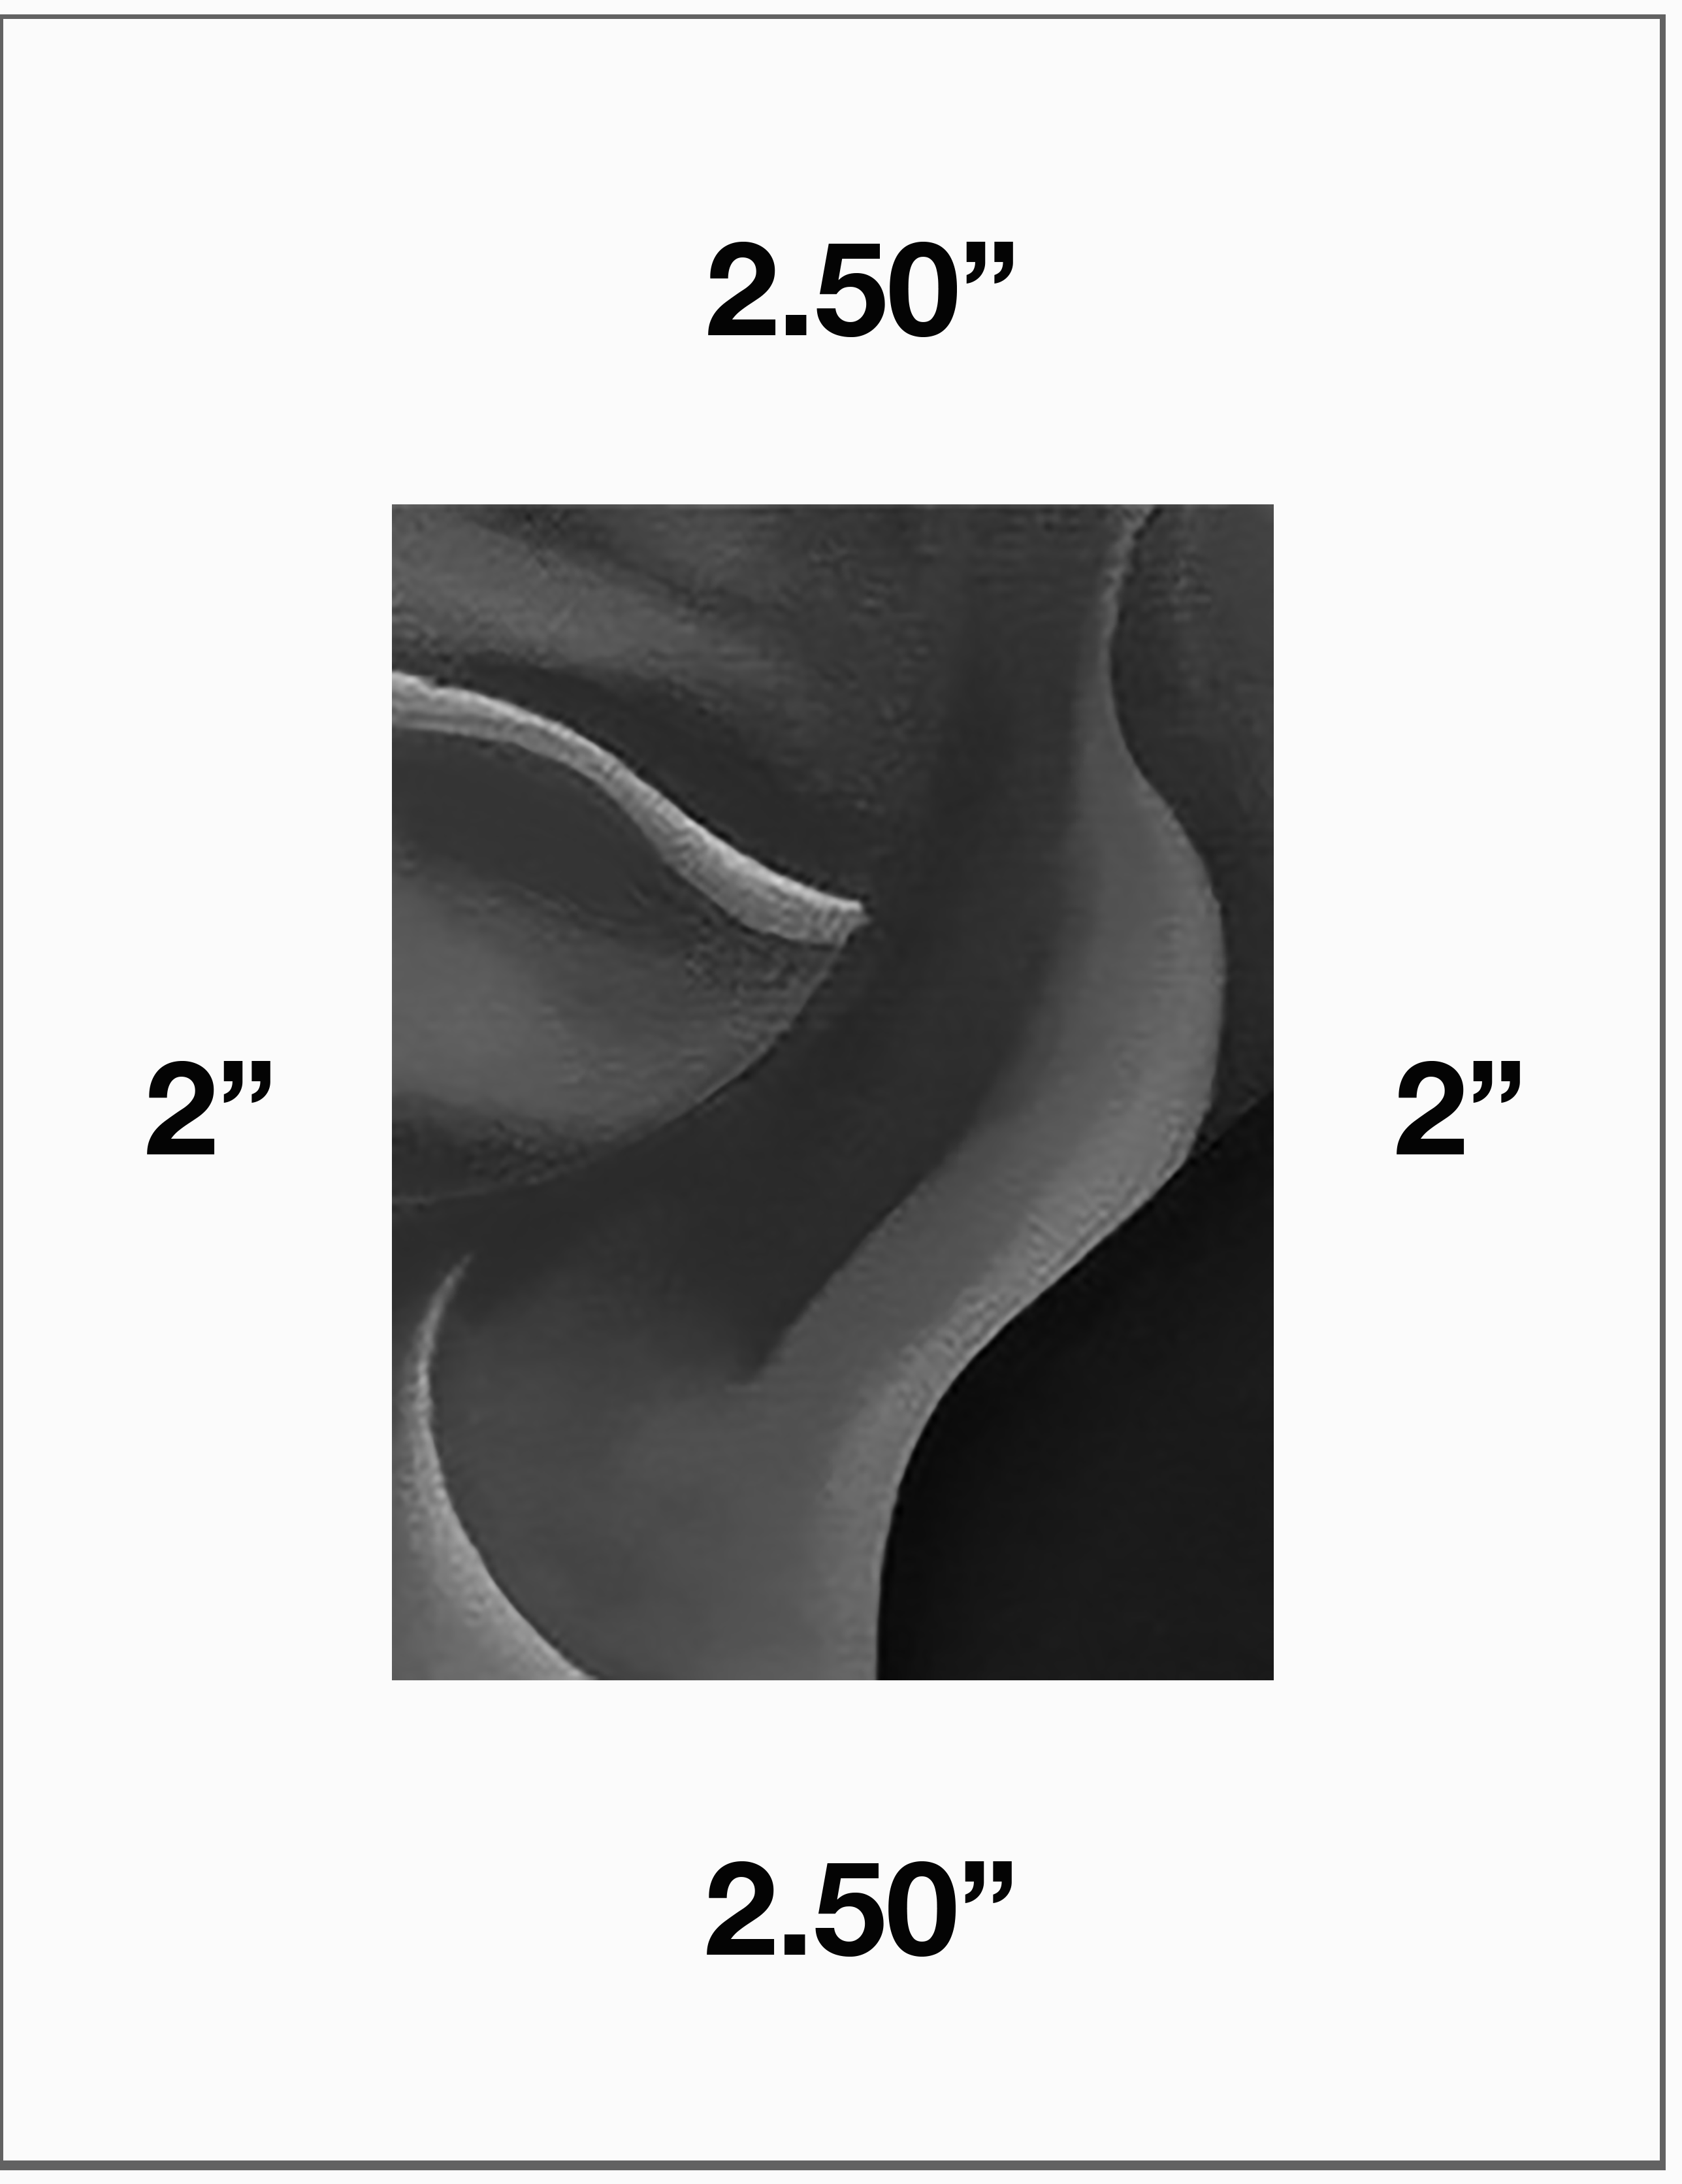
1. Using a sharp 2B pencil (like our Sharpwriter pencil) and a ruler on 8-1/2 x 11″ copy paper (not drawing paper), mark off a border as shown, so that your drawing area in 6 x 4.5″ <—-
2. I’ll be emailing a video demonstration, which will start with a lightly drawn schematic drawing to locate the shapes in their correct proportion and location within the rectangle.
3. It’s especially important that your shapes intersect the edge of the rectangle in the correct location so that they match up with the neighboring tile when the 36 tiles are assembled. Make careful note of each location by visualizing its relationship to the major divisions of each side–quarters, thirds, and halves.

4. Once the shapes are located and sketched in lightly, begin developing your value drawing, with particular attention to where each value falls on the value scale from white to black. Artists use two types of value scales–continuous tone or steps:
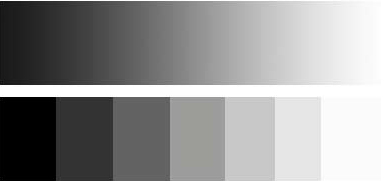
Note the illusion of a “scalloped” space in the step scale. This is due to a phenomenon that perceptual psychologists refer to as simultaneous contrast. When two values meet–right where they meet–the darker one will appear a bit darker than its overall tone and the lighter one a bit lighter than its overall tone, resulting in this effect. There’s not an actual gradation there but an illusion as the eye responds to the two values simultaneously.
Most importantly, you can capitalize on this phenomenon in your value drawings, adjusting values not only within themselves but in relation to one another, so that another way to make something look darker is to make its neighbor lighter, and visa versa.
5. The goal of your shading technique, which I’ll demonstrate in the video, is to create a high-resolution, fine grain value drawing. In addition to matching up shapes along each border, matching up values will be a goal as well. The closer each of us comes to the values on our original, the better all 36 tiles will work together.
6. If you’re tempted to smudge the graphite to speed things up, don’t. Smudged graphite is much harder to control and looks like hell. Build your values with hatching, as shown in the video, for a much “brighter” and richer visual texture.
7. Also key to this assignment–and a critical skill in value drawing–is recognizing and recording different types of edges and gradations from the sharpest to the softest, most gradual, and everything in between.
8. When your two pencil drawings are complete, prepare two more pieces of copy paper in the same way as before and do the identical drawings a second time but this time in pen, with a 30-minute time limit to complete each drawing–meaning that your cross-hatching will be fast and furious; basically a controlled scribble. An upcoming video demo will show you how.
9. In short, you’ll be making four drawings in all–two high-resolution value drawings in pencil and two scribbled cross-hatch drawings in pen, of the same two images.
10. When your drawings are complete, please photograph, edit, and post them on Blackboard, under Team Value Drawing.
11. I’ll reassemble them into the overall images and post them here.